
 中文
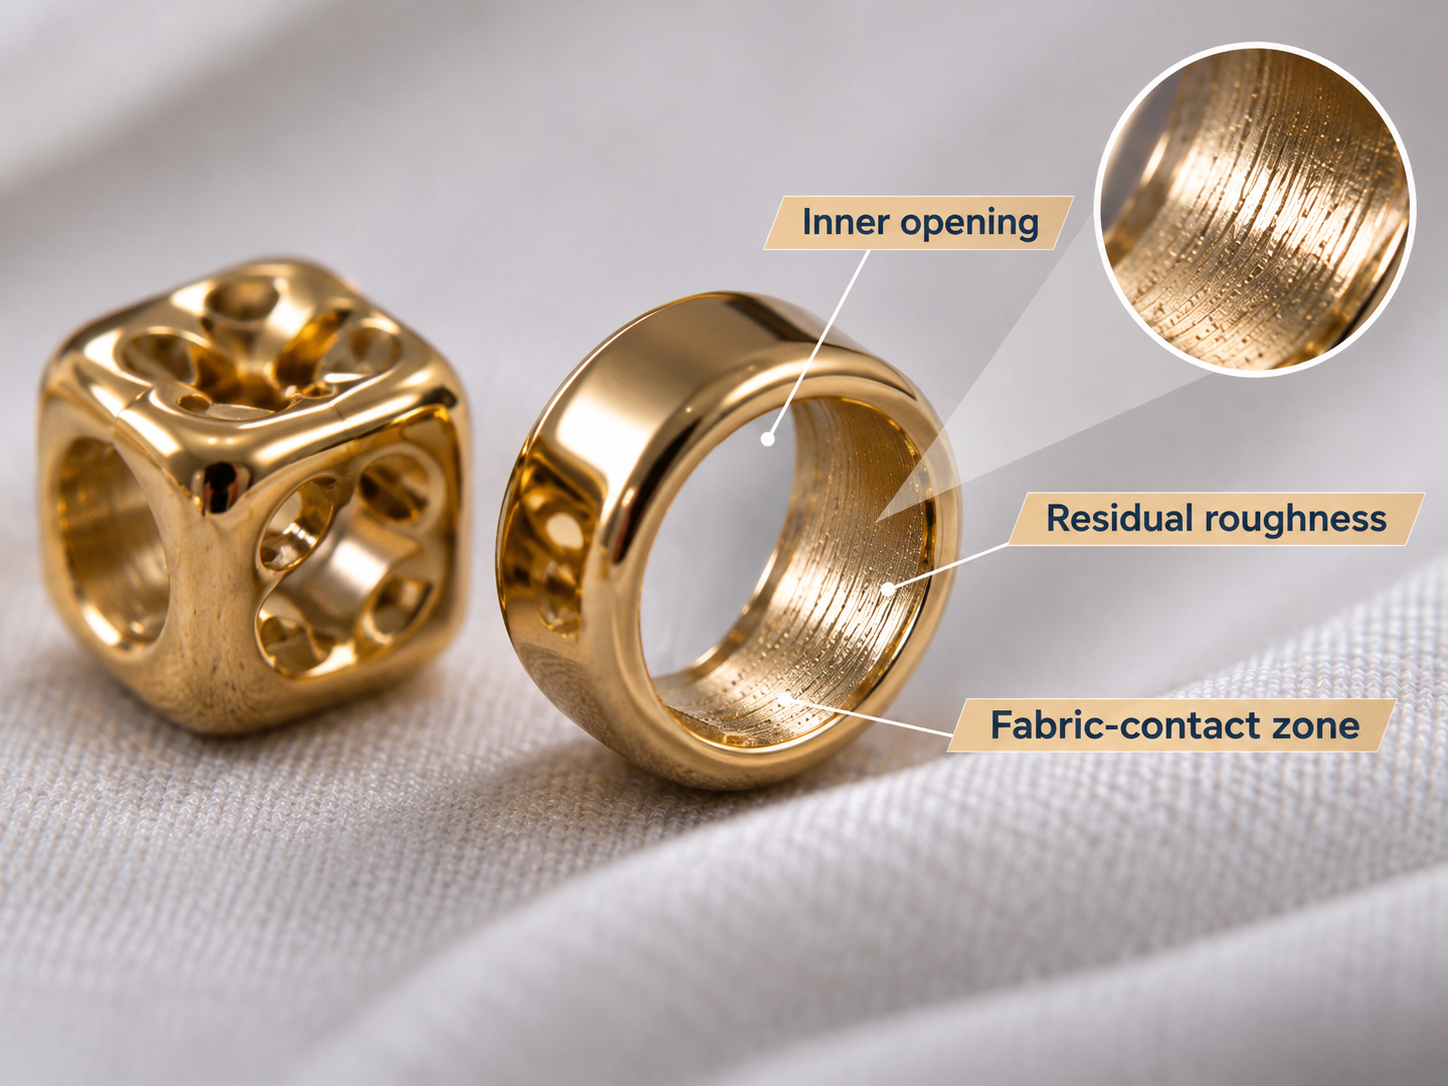
On the production sheet for the gold-tone bead shown here, the instruction is specific: manually remove the burrs at both ends, and make sure the part does not catch the fabric. That line deserves more attention than a general request for a smooth finish. It identifies where the work is needed and what the finished component must do when it meets a textile.
Production instruction: “手刮两头披锋,不可以刮布” — hand-deburr both ends; the part must not catch the fabric.
The outside texture and the hole edge have different jobs
The part has a compact, roughly square body, an uneven decorative texture and a through-hole. In our production photograph, some pieces show the gold-tone outer faces while others expose the opening. The finishing entry on the sheet specifies rack plating and a gold tone. The separate workmanship note calls for hand deburring at both ends. These are two distinct requirements on the same component.
The uneven outer texture is part of the appearance. A projecting burr at the opening is a different feature. Making the whole part uniformly smooth would lose that distinction. On this order, “both ends” locates the hand work at the hole openings. It keeps the intended decorative character separate from the edges that will contact the textile.
Why the instruction says both ends
A through-hole has an entrance and an exit. When a tie is threaded, it passes one rim and then the other. After assembly, a flexible textile can also lean against either opening as the component changes angle. Finishing the more visible side alone leaves the second contact edge outside that instruction.
The practical distinction is easy to miss when a small bead is lying among other pieces: the operator turns it over, and the rim that was underneath becomes the next working edge. The word “both” makes this a two-sided operation. It also gives inspection a defined location to examine, rather than treating the piece as one generally shiny object.
Hand deburring needs a clear boundary
The method on our sheet is manual scraping of the burrs. The working boundary matters: the raised edge needs to be removed without casually reshaping the opening. An approved physical sample is more useful here than an operator judging the part only by how bright the rim appears under the light.
For this type of part, removing a projecting edge and changing the hole geometry are separate actions. Excess removal can alter the rim, leave a visible mark or change the opening. The intended result is a clean textile contact edge that remains consistent with the approved component. Tool choice, working direction and the accepted edge condition should be settled on the actual sample, rather than inferred from a photograph.
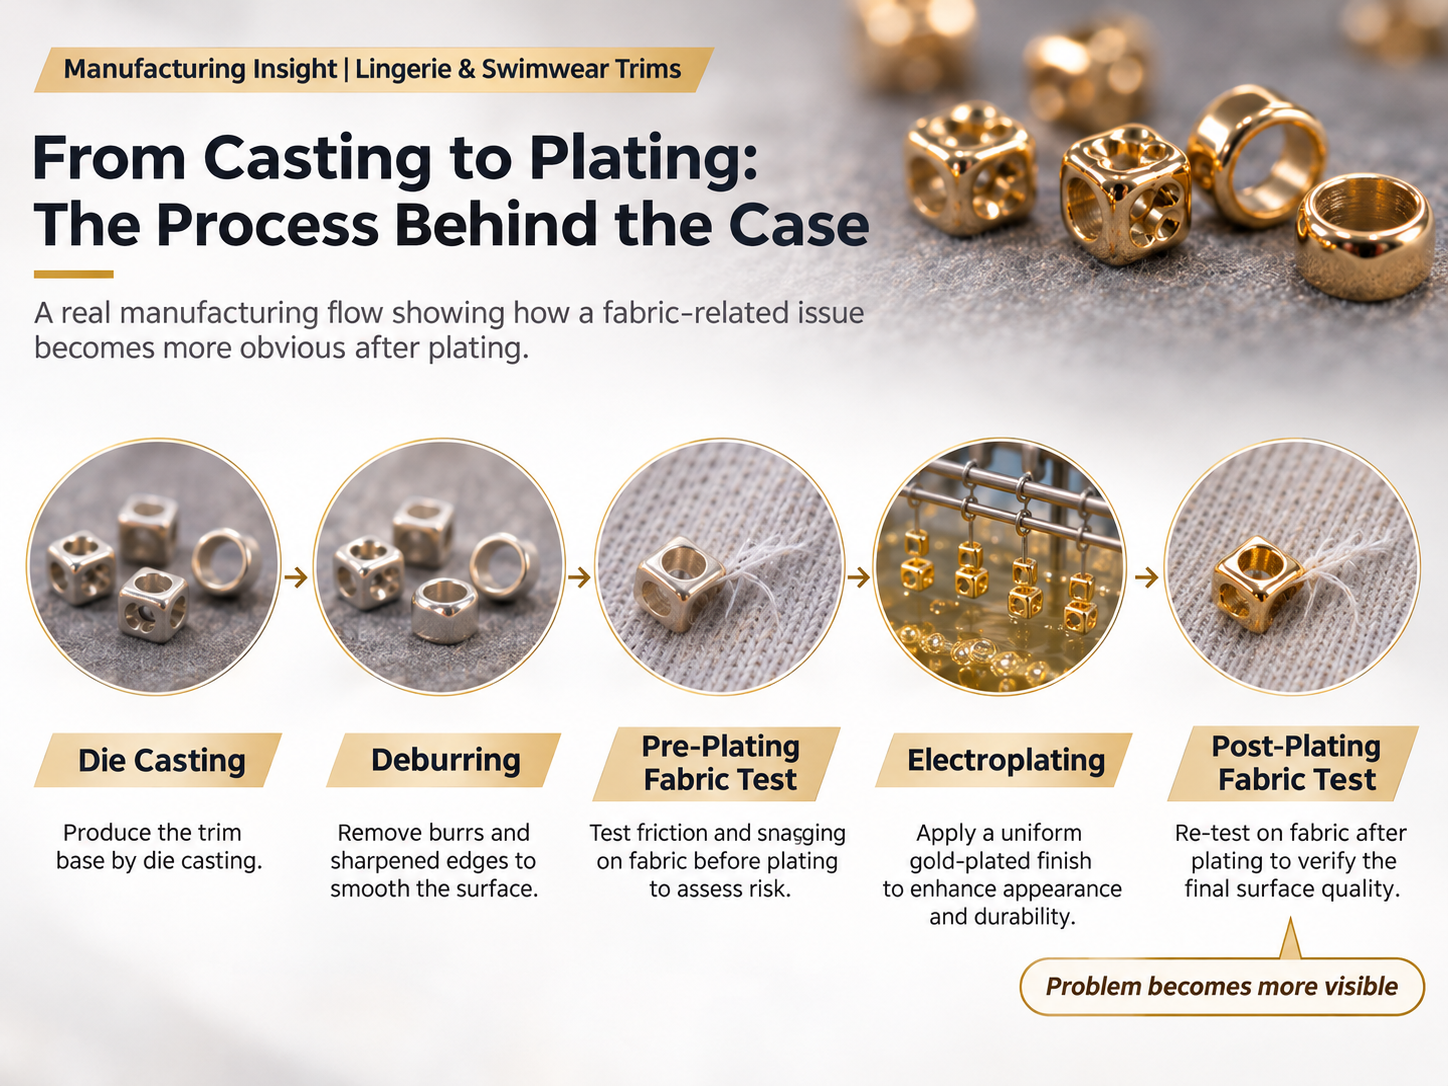
A good-looking gold surface answers only part of the question
A face-on view is useful for checking the tone and decorative texture. It provides limited information about the inner rim. A small projection can sit at the transition into the hole, where reflections and viewing angle make it difficult to judge from an overall photograph.
For inspection, it helps to separate the checks: compare the decorative face with the approved appearance sample, then turn the piece and inspect each opening under suitable light and magnification where needed. The two openings deserve their own attention, even when the colour and outside texture already look right.
Translate “must not catch the fabric” into an assembly check
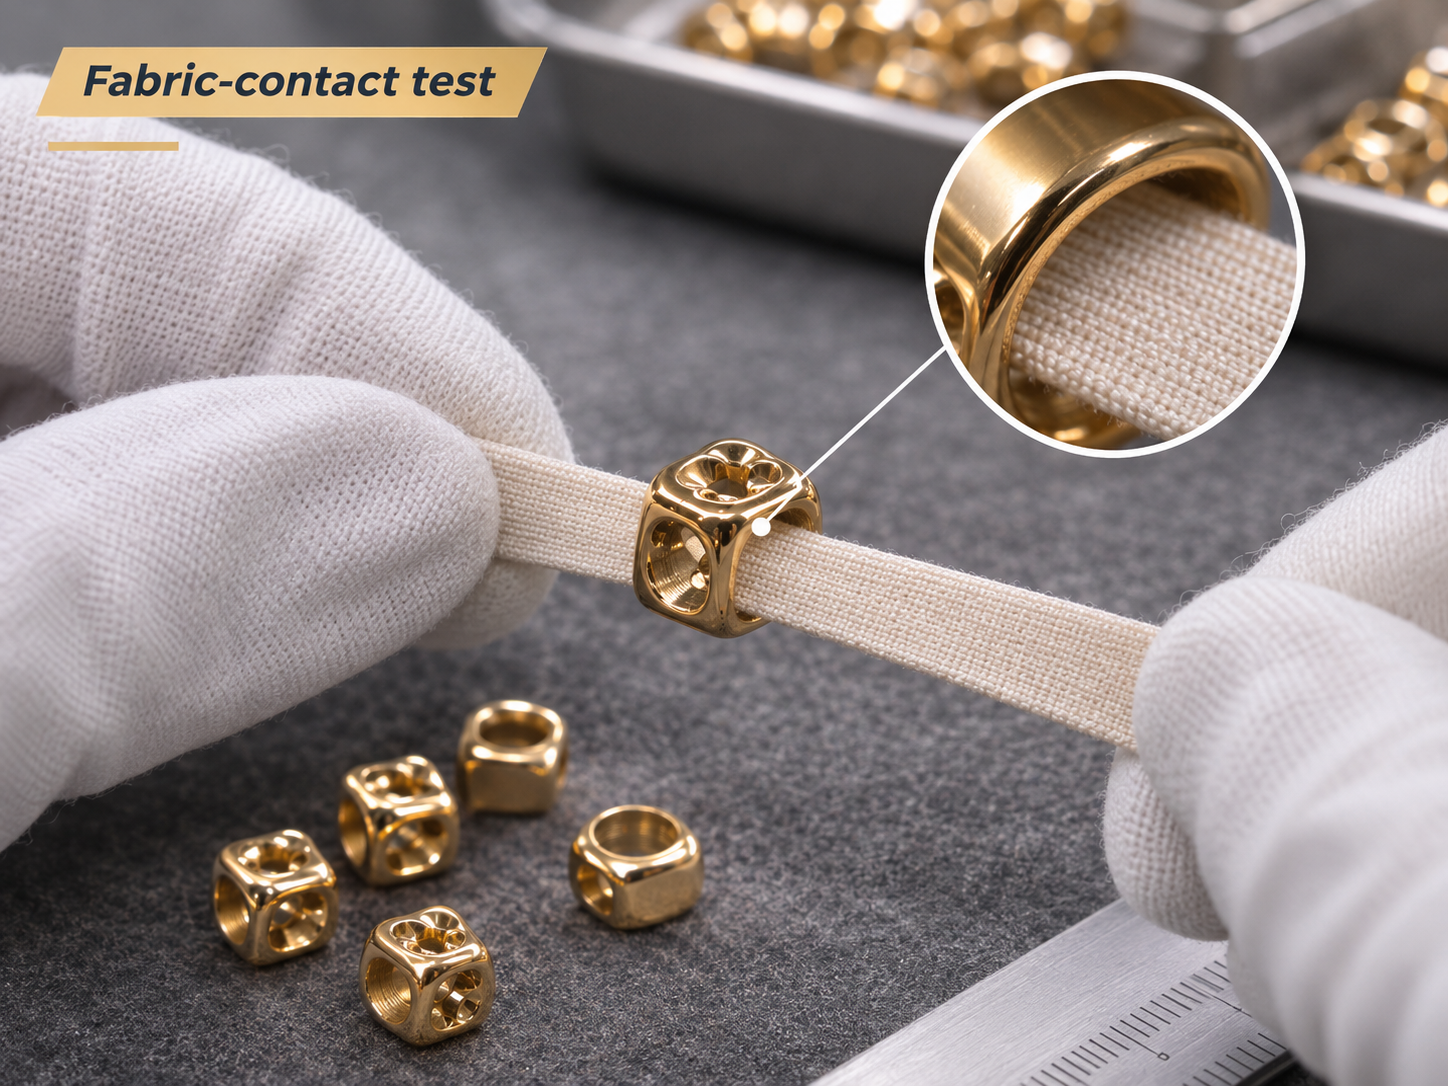
The final phrase connects the metalworking instruction to the garment. A hole can look acceptable and still behave differently when the intended textile is threaded, pulled through or allowed to sit at an angle. That is why the assembly material belongs beside the approved bead sample.
A proposed check for this application is to use the actual production tie or fabric construction, thread it through the part, and move it against each rim in the directions the assembly permits. Inspect the contact area for caught yarns, pulled loops, fuzzing or cuts, while also checking for local snagging during movement. The materials, movements, repetitions and acceptance criteria need to be agreed for the project. These are development checks to agree for the project; the production sheet itself records the workmanship requirement.
What should travel with the approved sample
The written line is useful because it is short and tied to a particular part. To carry that requirement into another production run, it should travel with the approved physical sample and the relevant drawing, not be left as an informal comment that disappears when people change.
- Identify both openings on the part reference, so the working and inspection locations are unambiguous.
- Keep the accepted outer texture, hole geometry and contact-edge condition distinct in the approval record.
- Retain the actual tie or fabric construction used to assess the assembled sample.
- Record the agreed check and its acceptance criteria; reassess them when the component, textile or finishing process changes.
The useful detail in this case is not a broad promise of quality. It is the connection between a precise operation—hand-deburring both openings—and a garment requirement: the part must not catch the fabric. For a decorative swimwear bead, the visible surface and the textile contact edges belong in the same approval conversation.
Developing a bead for a swimwear tie?
Send the bead reference, the actual tie or fabric construction, its position on the garment and the appearance you want to retain. These give the development discussion a more useful starting point than a finish colour alone.
Discuss an accessory projectFor a wider development plan, Intertek describes accessory assessment across physical, mechanical and chemical properties. The edge-work discussion here is only one part of that assessment. Intertek · Accessory Testing Services